Jewelry Photography From A to Z


6

Courses

TO MASTER THE ART OF JEWELRY PHOTOGRAPHY

STARTER SERIES

Jewelry Photography For Beginners

In this course, Alex Koloskov will show you how to start in jewelry photography with minimal equipment, and still take beautiful photos of various jewelry using inexpensive cameras and lighting

ADVANCED SERIES

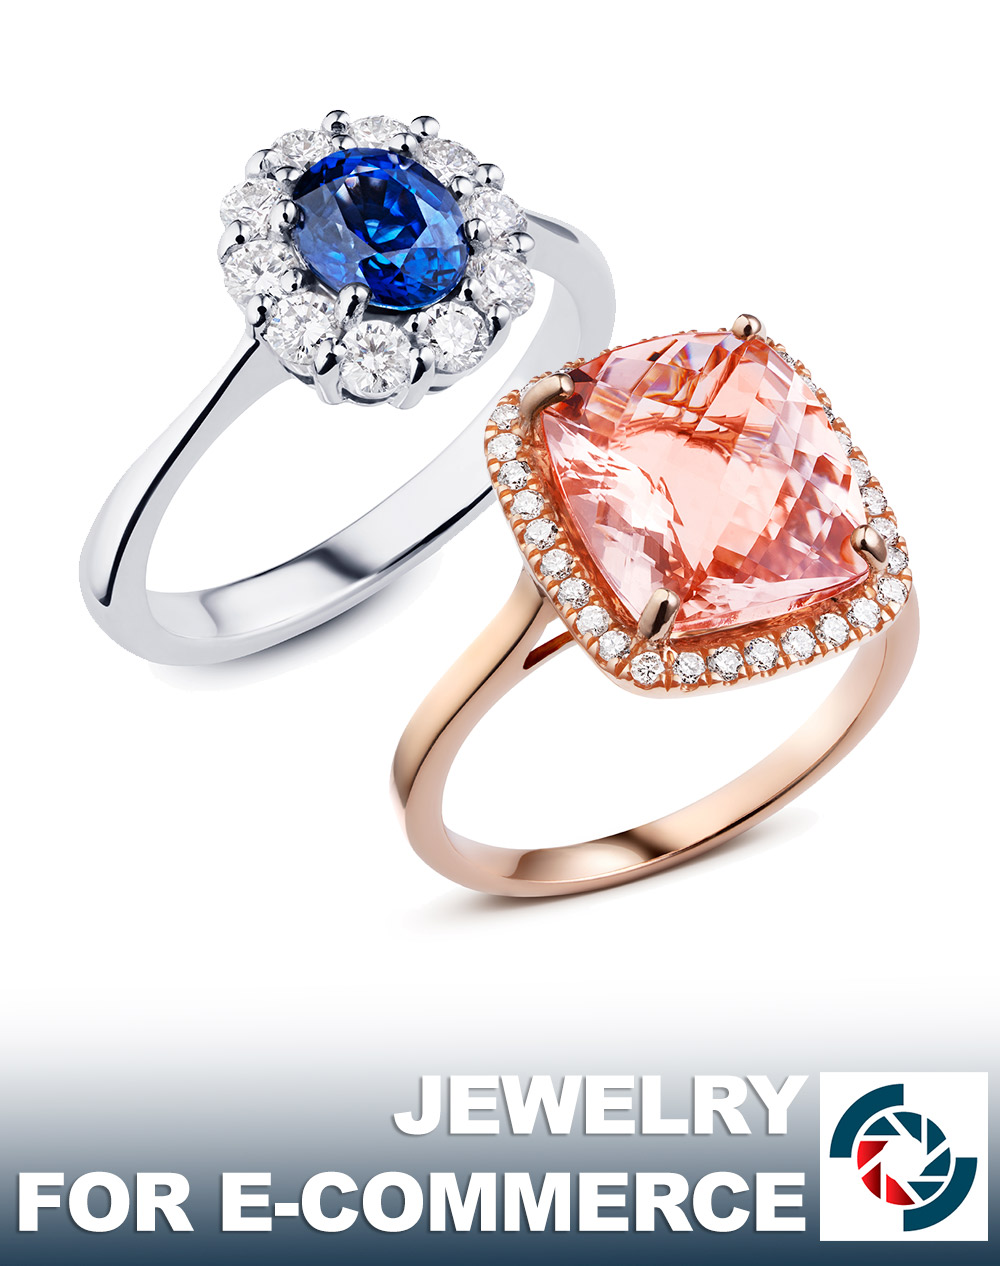
Jewelry Photography for E-Commerce

Whether you are shooting e-commerce jewelry for clients or for your own business, this course has you covered. Everything from rings to necklaces to earrings. And once you understand the techniques involved, you will be able to apply them to an even wider range of subjects and get amazing results.

PROFESSIONAL SERIES

Jewelry Photography- Shooting

In this course, you will learn:

How to setup lighting for various types of jewelry. We’ll cover difference in lighting for large gemstone jewelry, glossy metal and everything in between.


PROFESSIONAL SERIES

Jewelry Photography- Retouching

In this workshop-based course you will learn: How to retouch luxury jewelry using Adobe Photoshop and various plugins because of a specifics of jewelry photography (extreme macro), retouching is an essential part of the process and our expert will teach you secrets on post-production for jewelry

PROFESSIONAL SERIES

Watch Photography for Professionals

Need an additional revenue source for your off seasons? Product photography can be the perfect compliment to your business, and many of the skills, techniques, and tools are applicable to both types of photography.

ADVANCED SERIES

Creative Jewelry Photography-

"The Diamond Drop"

This training video is an advanced to Pro level workshop that takes you through the shooting of a Na Hoku Wave pendant and chain. In the video you will see how to take a subject from rough concept through the entire shoot and all the way to post-production of the final image.

STARTER SERIES

JEWELRY PHOTOGRAPHY FOR BEGINNERS


Jewelry Photography For Beginners course

$95

DURATION

5 hours, 30 minutes

LEVEL

Amateur, Beginner

INCLUDES

Post-Production lessons, Bonuses

This course is for you, if you...


  • Looking for a fast start in jewelry photography.

  • New to jewelry photography but want to offer this service for your client.

  • Don't have a lot of professional equipment.

  • Hobbyist that going to have fun taking pictures of jewelry and gemstones.

COURSE CURRICULUM


Course includes 4 modules

Jewelry Photography for Beginners

01

JEWELRY PHOTOGRAPHY WEBINAR (3.05 hours)

In 3 hour-long webinar, Alex Koloskov shows effective lighting setups for shooting rings, pendant and earrings. Cost effective DIY solutions to save your budget are included. Using inexpensive LED bulbs you’ll be able to light jewelry pieces for your clients or your own business.

Jewelry Photography for Beginners

02

HOW TO SHOOT JEWELRY ON WHITE BACKGROUND (25 min)

Elegant and simple yet effective lighting setup for shooting jewelry on a completely white background is covered in this section. Learn how to to get constantly beautiful images of your jewelry pieces. Ideal lighting setup for e-shop.

Jewelry Photography for Beginners

03

POST-PRODUCTION (2 hours)

In-depth structured post-production tutorials by our Photoshop expert are easy to follow! Make your shots even more beautiful following video instructions. 

ADVANCED SERIES

JEWELRY PHOTOGRAPHY FOR E-COMMERCE


Jewelry Photography For E-Commerce course

$195 


DURATION

5 hours, 48 minutes

LEVEL

Intermediate-Pro

TYPE

Online Video Course

Highlights


  • Learn to take great shots even on a tight budget. You will learn how to create your own DIY light modifiers and get gorgeous results.​

  • Two professional retouchers demonstrate their personal workflows for commercial-quality results. As a bonus, they also teach you how to obtain the best result possible when your client’s budget and turnaround time demand economy and speed.​

  • Quick and easy-to-follow lessons. We know that you don’t have lots of time to spend, so we keep it brief!​

jewelry_e-commerce
  • Ask questions on our online forum and get answers from our professional instructors.​

  • Lifetime access to the course materials.

  • After course completion, you’ll have an option to submit your homework to be reviewed by the instructor – professional feedback is key to successful learning!​

Who will benefit the most from this course?


  • Photographers seeking to learn how to shoot jewelry on pure white backgrounds for paying clients.

  • Craftmakers who create their own jewelry and need high quality images for their online stores (Etsy, eBay).

  • Hobbyists and photography beginners who would like to learn jewelry photography without spending lots of money on studio lighting.

COURSE CURRICULUM


Course includes over 5.5 hours of instruction in 14 video lessons

Gear For Jewelry Photography

01

Gear For Jewelry Photography [00:23]

Choosing the Right Gear [00:23]
In this video, you will learn all about the gear you will need to photograph jewelry close-up, including:

  • Camera and Lenses for close-up jewelry photography
  • Options on lighting systems for video production
  • Selecting and using the right light modifiers, from diffusers to cones, plus how to create them yourself if you have a limited budget
  • Strobes versus continuous lights: advantages and disadvantages of each
  • Fresnel lens versus reflector with honeycomb grids
  • C-stands and other grip equipment
Shooting

02

Shooting [01:15]

S1: Practical Lesson - A Case Study: Working with a student request [00:30]
The course kicks off with an actual case study posed by a student commissioned to photograph a piece of jewelry for a client. Alex works within the constraints of the job to help the student get a brief, but all-encompassing overview of the necessary techniques to capture the image, from the positioning of the lights and subject to automating the focus-stacking process in Photoshop.


S2: Practical Lesson - Blue Ring Shot [00:45]

Learn how to photograph a ring with just two diffusers while taking control of the reflections that define the shape and polished surface of the ring's band. In this video, you will also learn a simple process for determining the optimal placement of your strobes to create the best highlights.

Shooting

03

Shooting 00:14]

S3: Practical Lesson - Yellow Ring Shot [00:05]
With a few minor adjustments to the lighting setup, see how to ensure all of the gemstones are well-lit, using the basic setup from the previous lesson.


S4: DIY a Photography Cone [00:09]
In this lesson, learn how to create a simple DIY shooting cone that attaches perfectly to your camera lens.

Shooting

04

Shooting [00:23]

S5: Practical Lesson - Pink Earrings with a Shooting Cone [00:15]
Shooting suspended earrings requires a different set up. In this lesson, you will learn how to create this easy to adjust setup that is great for high-volume jobs.


S6: Practical Lesson - Shooting Moonstone & Amber Earrings [00:08]
The work with earrings continues in this lesson, demonstrating the practicality of the setup, even when the jewelry items have a combination of gemstones.

Shooting

05

Shooting [00:17]

S7: Practical Lesson - Shooting a Necklace with the Cone [00:04]
In this lesson, the basic earring setup is adapted to use with a suspended necklace.


S8: Tricky Stuff: Shooting Ring from the Front, Part 1 [00:11]

A completely different approach is needed to shoot a ring from the front. This lesson demonstrates a simple, high volume approach to capture this tricky image.


S9: Tricky Stuff: Shooting Ring from the Front, Part 2 [00:02]
The shooting lessons conclude with a wrap-up demonstrating the utility of the setup created in the previous segment.

Post Production
Post Production

06

Post-Production [02:50]

P1: Pink Ring Post-Production by Ilya Plotnikov [01:10]

Retouching instructor Ilya Plotnikov demonstrates a straight forward post-production workflow any photographer can follow to create the final image of the pink ring, from surface cleanup to color correction.


P2: Blue Ring Post-Production by Artem Pissarevskiy, In-Depth Retouch [01:19]

In this lesson, Retouching instructor Artem Pissarevskiy walks you through an in-depth retouch of the blue gemstone ring, covering the steps and techniques you need to know to create a flawless, commercial quality final image.


P3: Blue Ring Post-Production by Artem Pissarevskiy, Fast Retouch [00:21]

When speed and efficiency matter, you need to know how to apply the right techniques to get the best results possible. In this final post-production lesson, Artem shows what is possible to achieve with the same ring, but in just 15 minutes. The workflow obviously needs to be different, so Artem teaches you  how to get maximum results in the minimum time, a crucial skill for high-volume e-commerce work. One of the rings took five times longer to retouch, but which one?

Online Workshop Recording Bonus

07

Online Workshop Recording (Bonus)

The recorded webinar where instructor Alex Koloskov explains what gear (cameras, lenses, lighting and light modifiers) are suitable for jewelry photography and demonstrates how to use this gear to create beautiful, focus-stacked images of jewelry on a white background. Includes the full live Q&A!


Before-After Post-Production

Left – SOOC (straight out of the camera),  Right– after Adobe Photoshop

SOOC - BEFORE

AFTER

SOOC - BEFORE

AFTER

PROFESSIONAL SERIES

LUXURY JEWELRY PHOTOGRAPHY - SHOOTING


Luxury Jewelry Photography - Shooting

$175 

DURATION

5 hours, 48 minutes

LEVEL

Advanced, Professional

TYPE

Workshop-based lessons

This course is for you, if you...


  • Photographer looking to expand your business offerings for jewelry makers

  • Part of a jewelry making business and want to teach your crew members to take jewelry photos with minimal investment in gear.​

  • Hobbyist that going to have fun taking pictures of jewelry and gemstones. Here you can create the content that will be used within the module.​

IMAGES YOU'LL BE ABLE TO MAKE YOURSELF


Alex will teach you how to take images like this in this course

PROFESSIONAL SERIES

LUXURY JEWELRY PHOTOGRAPHY - RETOUCHING


Luxury Jewelry Photography - Retouching

$175

DURATION

13 hours, 59 minutes

LEVEL

Advanced, Professional

TYPE

Post-Production lessons

This course is for you, if you are...


  • Photographer or Retouching looking to expand your business offerings to jewelry makers

  • Part of a jewelry making business that looking to teach own grew members to take jewelry photos with a minimal investment in gear.

  • Hobbyist that going to have fun taking pictures of jewelry and gemstones

Before-After Post-Production

Left – SOOC (straight out of the camera),  Right– after Adobe Photoshop

SOOC - BEFORE

AFTER

SOOC - BEFORE

AFTER

SOOC - BEFORE

AFTER

SOOC - BEFORE

AFTER

PROFESSIONAL SERIES

WATCH PHOTOGRAPHY FOR PROFESSIONALS


Watch Photography for Professionals

$145

DURATION

6+ hours

4 WATCHES

Different subject, different techniques

DARKROOM

Post-Production Included

COURSE CURRICULUM​


Course includes 5 modules and 14 video lessons

TAG Heuer Carrera Heuer 02T with Tourbillion

01

TAG Heuer Carrera Heuer 02T with Tourbillion

Top-down watch (gunmetal) with props Creative shot, involving propping the scene. We tried various lighting techniques before found the best that worked for this watch. The image is SOOC preview from the lesson (no post-processing)

Rolex Oyster Perpetual Rhodium Dial

02

Rolex Oyster Perpetual Rhodium Dial

Classic look for a classic watch Simple and effective holder for the watch, shooting with cone. On this part of the course we explored secrets of working with a shooting cone. Sometimes it gets tricky no make glossy things look right with the cone - and this lesson covers this and much more! The image is SOOC preview from the lesson (no post-processing)

Audemars Piguet Millenary

03

Audemars Piguet Millenary

The most beautiful and hard to photograph watches from the course. We worked with this watch using conventional diffusers, explained how to change the light to get a desired reflection from the metal - this watch has a signature finish on internal parts that must to be showcased by a photographer. The main goal of this shot was to create a dramatic look of a spectacular watch. The image is SOOC preview from the lesson (no post-processing)

Full Post Production

04

Full Post-Production

Every watch we photographed will be cleaned and enhanced in Adobe Photoshop by Photigy post-production guru. You will have access to full length post-production videos as well as RAw and PSD files

Video + Still Images in one photosession

05

Video + Still Images in one photosession

In this lesson you will learn how to create video footage of watches you shoot without changing anything except you camera mode. This technique allows you to leverage more revenue for your business, offering your clients video production as well. The image is SOOC preview from the lesson (no post-processing)

 Watch with Smoke, Creative Photosession

06

Watch with Smoke, Creative Photosession

This lesson is about one of creative ways to photograph watches, inspired by several photos in instagram where waches were photographed with smoke. This could be a great way to bring more attention to your portfolio! Now included into this course The image is SOOC preview from the lesson (no post-processing)

Bonus Video Lessons

07

Bonus Video Lessons

Any modern camera is capable of capturing beautiful video - learn how to make profit offering video service for your clients!

Images From The Course


Sample photos from the program’s video lessons that you will learn.

Before-After Post-Production

Left – SOOC (straight out of the camera),  Right– after Adobe Photoshop

SOOC - BEFORE

AFTER

SOOC - BEFORE

AFTER

SOOC - BEFORE

AFTER

BONUS

CREATIVE JEWELRY PHOTOGRAPHY - “THE DIAMOND DROP”


The Diamond Drop course

$95 

COURSE CURRICULUM


In-Studio

01

In-Studio

1st lesson Duration: 00:09:00

2nd lesson Duration: 00:12:00

Looks at the background setup for this shot. Here you will see how the glass table was built. Next you will see how the light behind the seamless background affects the shot.

3rd lesson Duration: 00:09:00

4th lesson Duration: 00:13:00

5th lesson Duration: 00:09:00

6th lesson Duration: 00:09:00

7th lesson Duration: 00:09:00

Post-Production

02

Post-Production

Post-Production 1 Duration: 00:11:00

Post-Production 2 Duration: 00:07:00

Post-Production 3 Duration: 00:06:00

Post-Production 4 Duration: 00:09:00

Post-Production 4.5 Duration: 00:57:00

Post-Production 5 Duration: 00:09:00

Post-Production 6 Duration: 00:15:00

Post-Production 7 Duration: 00:05:00

Post-Production 8 Duration: 00:15:00

Downloads Duration: 00:01:00

ABOUT THE COURSE’S


Instructors


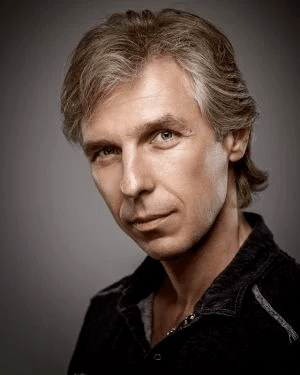
Alex Koloskov


Is “one of the most recognized product photographers in the world˝ and the founder of the Photigy school of photography.


He is also the man behind Photigy’s most popular courses and tireless idea generator.


Portfolio: www.koloskov.com

Artem Pissarevskiy


Artem is a professional retoucher from Finland. He’s been working in the post-production field for about four years.


He sees himself of a more technically skilled retoucher than an artist, specializing mostly in product and creative retouching and he enjoys problem-solving as it is a huge part of the post-production process.

Buy all 6 courses 

100% Privacy. We Will Never Spam You!

Our Student's Stories

Photigy is the greatest motivational and inspirational database of knowledge. 


Read full interview >>

With the help of Photigy’s program and the learnings I’ve gained from other digital art programs, I’m creating images that I would never have even contemplated a short time ago.


Read full interview >>

Photigy has allowed me to improve my skills at my current job. I have gained more respect from my co-workers and other photographers.


Read full interview >>

Photigy has been a huge part of my learning and has taught me far more than any other platform.


Read full interview >>

Definitely my involvement with Photigy throughout my work is tangible. Not only because my jobs have been improving over time, but also because it works like a source of inspiration.


Read full interview >>

Photigy enhanced my overall photography skills; after studying, I can create images that I couldn’t previously and of course it helps me in my work.


Read full interview >>

7 DAYS

MONEY BACK GUARANTEE

7 DAYS SATISFACTION GUARANTEE: If you are not completely satisfied with the purchase you have paid for, you may let us know with a note describing why you are disappointed and we will issue a full refund or credit your charge card for what you paid for the course or courses.

Alex Signature

Alex Koloskov

President, PHOTIGY

Photigy School Of Photography 2020